Building a shed is a fantastic project that can provide ample storage space, enhance your garden’s aesthetic, and even serve as a workshop. However, one of the crucial elements that are often overlooked is the ramp. Especially in St. Johns, with its unique terrain and weather conditions, a sturdy and reliable ramp can significantly ease the access to your shed. In this blog post, we’ll explore several DIY shed ramp ideas specifically suitable for St. Johns, ensuring that your design is practical, durable, and easy to install.
Understanding Your Shed Ramp Needs
You must first assess the purpose of your shed ramp. Is it meant for a lawnmower, bikes, or garden tools? Additionally, consider the incline and the space available. In St. Johns, where the weather can impact the materials used, you’ll want to ensure that your ramp is weather-resistant. Building a ramp that accommodates the load and is also easy to navigate is vital. It would help if you also took into account any regulations or codes that may apply.
Basic Ramp Design
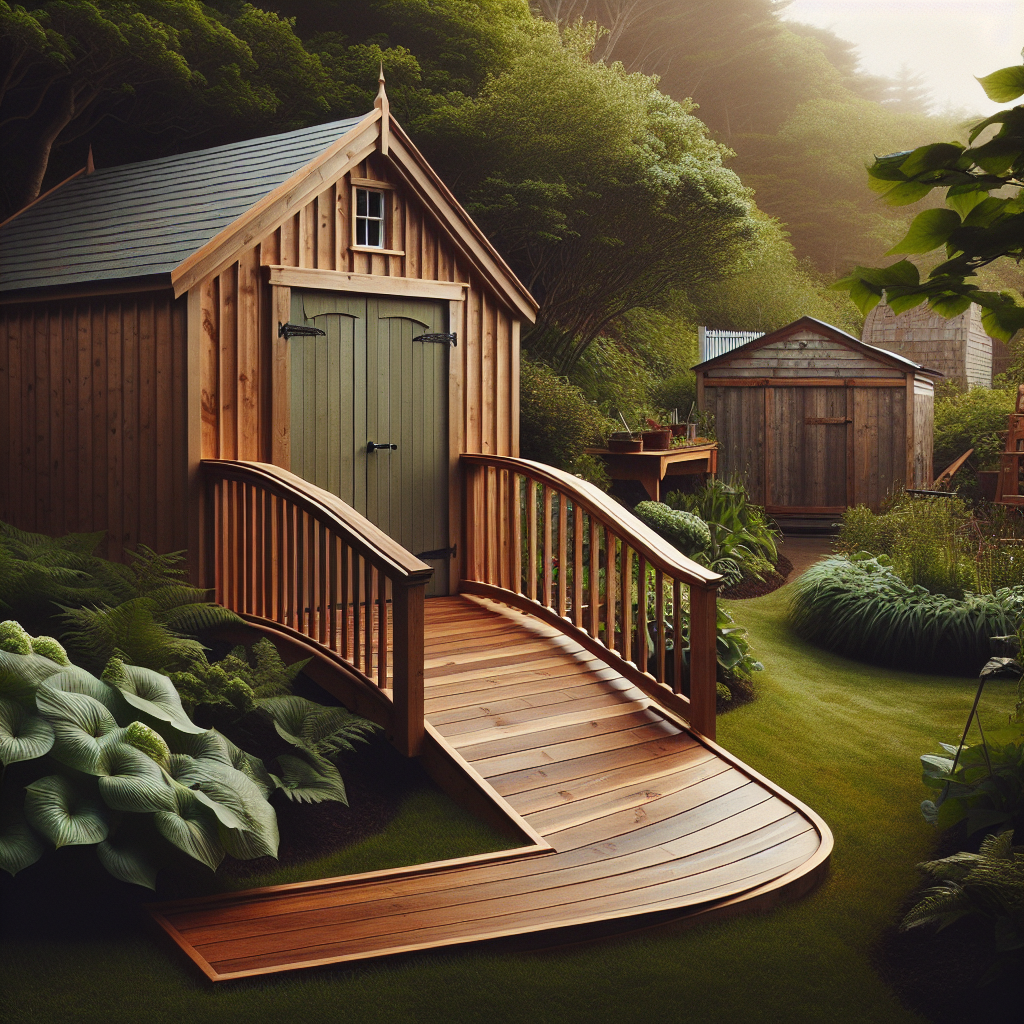
When designing your shed ramp, the basic structure typically consists of a frame and a surface that allows for traction. The simplest way to create a ramp is to use wood. Here’s how you can create a basic wooden ramp that is perfect for most storage sheds in St. Johns.
Materials Needed
To construct this ramp, gather the following materials:
- Pressure-treated lumber (for the frame and surface)
- Wood screws or nails
- Wood glue (optional)
- Anti-slip material (rubber mats or sandpaper)
- Measuring tape
- Saw (circular or handsaw)
- Drill
Construction Steps
1. **Measure the Height and Length**: Start by measuring the height of your shed’s entrance. Multiply this height by 12 to get the ideal length of the ramp; for every inch of height, plan on 12 inches of length for a gentler slope.
2. **Cut the Lumber**: Cut two longer pieces for the sides of the ramp and several shorter pieces for the slats that will provide the ramp surface.
3. **Assemble the Frame**: Use wood screws to attach the side pieces to the shorter slats. You can create a box-like structure, which will hold the ramp surface in place.
4. **Add Surface Material**: Attach the ramp surface, ensuring that there are no protruding nails or sharp edges. Sand down any rough areas to prevent injuries.
5. **Install Anti-slip Material**: Affix anti-slip material on top to prevent slipping, especially during rainy days typical in St. Johns.
6. **Position the Ramp**: Finally, position the ramp in front of your shed so it securely meets the threshold without any large gaps. Ensure that it is stable and can hold the expected weight.
Creative Ramp Ideas
While a simple wooden ramp works fine, you might want a design that is more customized to your shed’s look and functionality. Here are some creative ideas that can be implemented easily in St. Johns.
Gates and Ramps
Combining a gate with your ramp is a functional design choice. This setup allows secure access to your shed while also providing a means to keep animals or children from wandering inside. Building hinged gates attached to the ramp can create both a protective and practical environment.
Concrete Ramps
For those looking for durability, consider a concrete ramp. This requires a bit more effort in installation but offers a long-lasting solution. In a moist environment like St. Johns, concrete can withstand weather fluctuations better than wood. Simply build a form with 2x4s, pour in the concrete, and let it cure before use. Remember to add texture to avoid slips.
Modular Ramps
If you need a temporary or adjustable ramp, modular systems can be a fantastic solution. These ramps can be constructed using interlocking pieces that allow you to adjust height and length depending on your needs. Particularly useful in seasonal installations, modular ramps offer flexibility.
Ramp Installation Tips for St. Johns
When it comes to installing your ramp in St. Johns, consider the following tips:
Local Regulations
Before you start, check if there are any local building codes or regulations regarding shed ramp installations. This could save you from fines or redoing work later on.
Choose Durable Materials
Given St. Johns’ unique weather conditions, choose materials that can withstand rain and humidity. Pressure-treated wood and rot-resistant insulation are great for this purpose. Avoid using untreated lumber, as moisture will cause it to decay quickly.
Consider Drainage
Proper drainage is essential to maintain your ramp’s lifespan. Ensure that the ramp is slightly sloped to allow rainwater to run away from the shed rather than pooling at the base.
Incorporating Landscaping
Integrating your ramp with the surrounding landscape can enhance your shed’s overall visual appeal. Consider planting flowers along the sides or installing decorative stones leading up to the ramp.
Lighting
Especially in the fall and winter months, consider installing lighting along the path to your shed ramp. This can make it safer to navigate during dark hours and adds an aesthetic touch to your outdoor space.
Conclusion
The right DIY shed ramp can enhance your storage solution in St. Johns. Whether you opt for a simple wooden ramp or a more sophisticated modular option, always ensure that it’s safe and functional. Embrace creativity and incorporate landscaping elements that reflect your personal style. With the proper planning and construction techniques, your shed ramp will be an asset to your home for years to come.